Tuesday, May 21, 2013

How to Stain and Strip a Table

A few weeks ago, Kevin's parents were kind enough to give us their old kitchen table for our new place.  I started brainstorming some ideas of what we can do with the table and finally settled on staining it a dark color and pairing it with white, fabric or leather chairs.  Here's what it looked like before-  a light color wood with great metal detailing on the feet. 


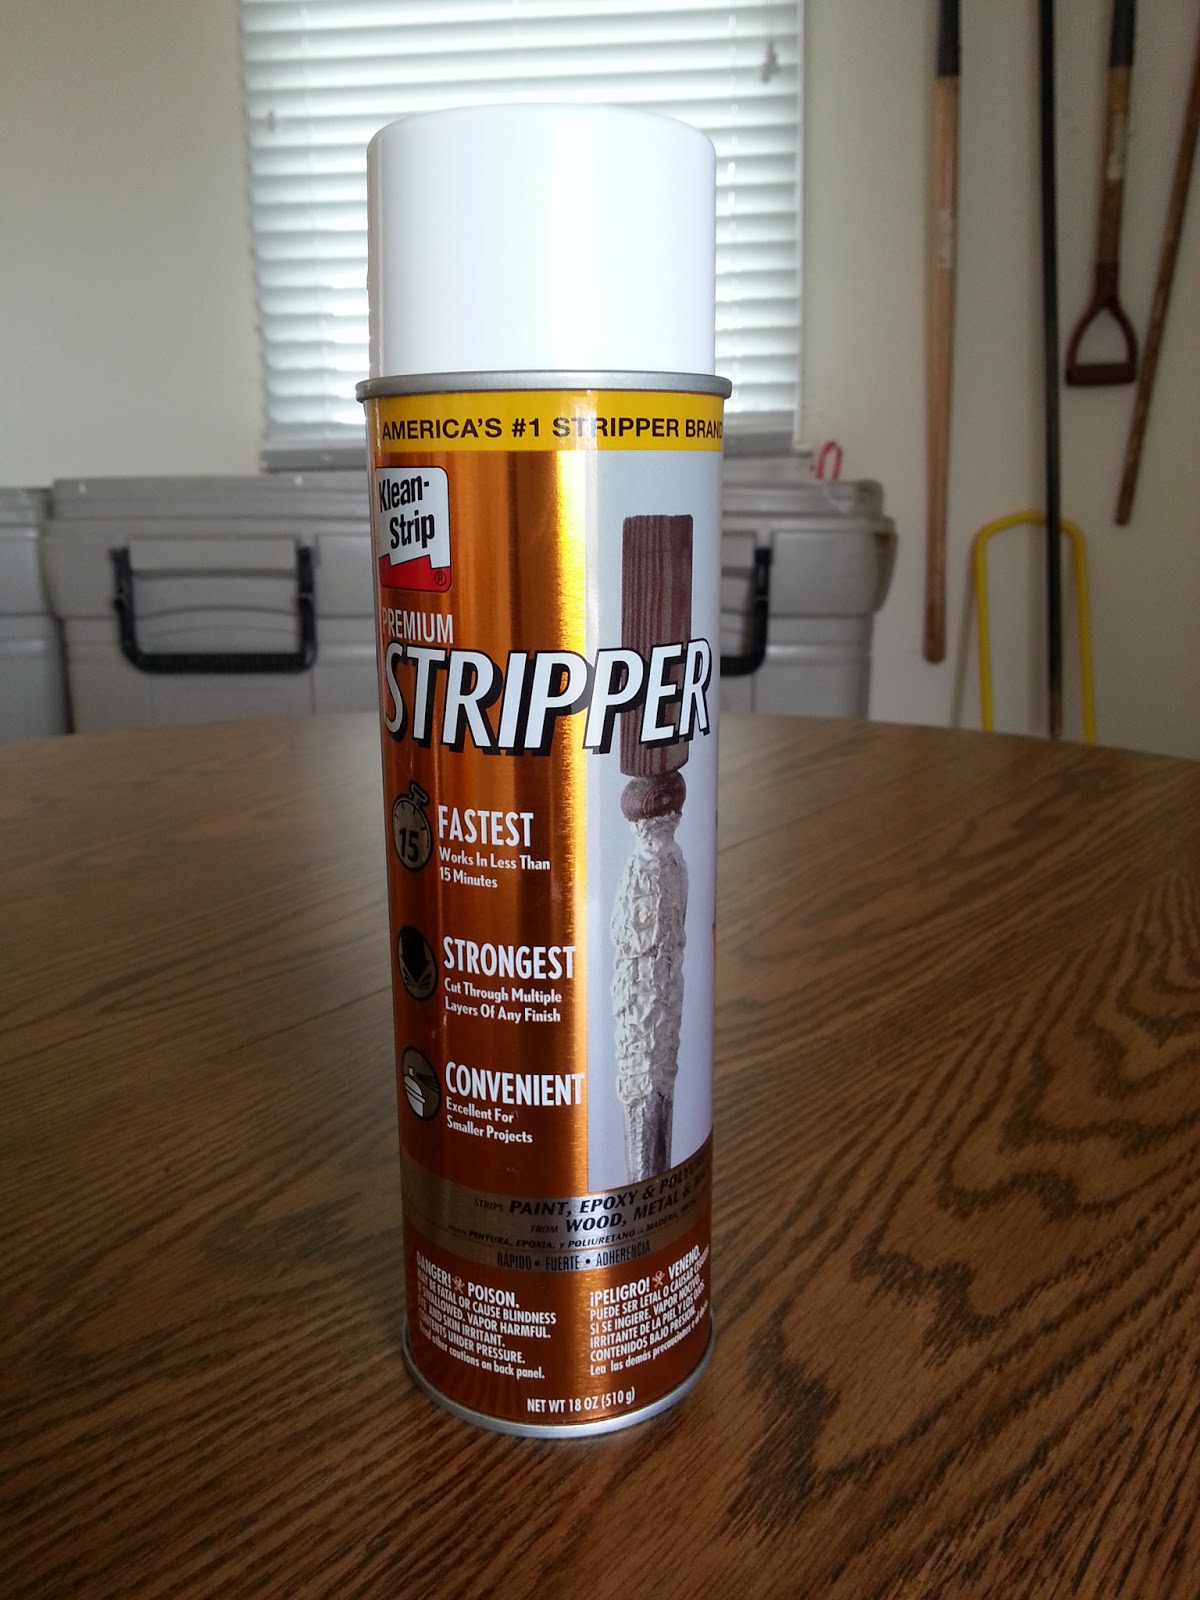
After some research, a Martha Stewart tutorial, and a chat with some nice Home Depot employees, I was ready to start my new project.  Since the table is solid wood on the bottom and vinyl on the table top (so they could set hot items on the table), I needed to purchase stripper for the table top.  You can use a can of stripper for larger projects, or spray stripper for smaller projects. 


Stripper is really intense, so make sure to wear gloves, goggles (in my case, sunglasses), and to use it in a well ventilated area.  Also be sure to use special plastic stripping tools and a metal container to dispose of the stripped material.  Whatever you do, don't let it touch your skin!  I got a tiny bit on my arm and had to scrub my arm with soap under cold water to stop the burning.  Very. Intense.


Stripping supplies, minus the scraper tools and wire brush tool


Step one is to spray on by hand, or paint on the stripper with a paint brush. You only have to let it set for 10-15 minutes before it starts to work.  Then, scrape off the stripper using the plastic scraper tools.  Next, wipe off the surface with a towel and let dry.  Then use a wire brush to scrape off the remaining reside.  Step five is to sand the area, then wipe with a wet towel and let dry. 


Spray on, or paint on the stripper

After you complete the stripping process, you are ready to start applying the stain.  With the help of the awesome ladies at Home Depot, I chose a stain that also contained polyurethane.  This ended up saving me a step!  I used "MINWAX PolyShade" in the "Honey Gloss" color.


Apply your first coat and let it set at least eight hours.  Since I was working on this project after work, I just let it set overnight.  On day two, apply your second coat and let it set another night.


Ta Da!!

Step two was to paint the side of the table top.  Since it was solid wood, I didn't have to strip it.  Instead, I just sanded it and then painted two coats.  I also let it dry a night in between each coat.  Next, it was time to stain the bottom of the table.  To gain easier access to the bottom of the table, we unscrewed the top and set it aside.  Then I sanded the table bottom.  


Next, I followed the same steps I did for the top of the table and painted two coats on the bottom of the table, while letting it dry overnight between each coat.


After painting two coats, I used a toothbrush to apply stripper to the metal parts of the table bottom.  Then, I scrubbed all of the edges of the metal with the toothbrush to remove the remaining residue.  Here's the finished table bottom:


Then I screwed the top of the table back onto the bottom of the table, and here's the finished product!


Tuesday, May 7, 2013

A Day in Ann Arbor - Sawyer & the Nichols Arboretum

This Sunday Kevin thought it would be a great idea to spend the day in Ann Arbor at the arboretum and to go downtown for lunch.  I had great memories of spending time with the pups at the arboretum in Tuscaloosa while I was in college, so I thought it would be a great idea to borrow Katie's dog Sawyer for the day. (We would have brought Callie too, but she is currently recovering from leg surgery.  Sorry Callie!)

Kevin made sure to double check the Nichols Arboretum website to confirm they allow dogs, and I got the OK from Katie to pick up Sawyer, so we were ready for a day of fun in Ann Arbor! 


Let's go, I call shotgun!

The arboretum is located in the middle of a neighborhood very close to campus, so we found a parking spot in the neighborhood and walked into the Geddes entrance to the arboretum.  First, of course, we had to stop and take some pictures with Sawyer.

Parking Map


Once inside the gate, there is a map at the entrance that shows you the different paths you can take.  This Web page explains the three entrances and what to do if you get lost:  Nichols Arboretum.

We took a stroll up the path and made our way to the river.  It was the weekend of graduation and all of the students were moving out for the summer, so there were lots of families taking strolls through the gardens and taking pictures in front of the river.  Needless to say, Sawyer received lots of attention.  He did very well with all of the other dogs and groups of people, we were very proud of him!  A few times throughout our walk Sawyer looked pretty tuckered out, so we made sure to give him plenty of water out of our camelback.  Wish I would have gotten that on video, it was pretty funny. Then, back at the car, he drank two bottles of water.  Poor pup, he's more of a "city" dog and enjoys his light strolls through Royal Oak. 


Making our way around the river


Sawyer, Sit


Sawyer, Lay Down


Great view of the river

Sunday Funday


Sawyer loves the camera


Pretty flowers!


After spending a while at the arboretum we were ready for lunch.  We had the bright idea of taking Sawyer for a walk downtown and grabbing some lunch at one of the tables on the sidewalk at one of the many restaurants, but soon realized that that was not going to happen.  Sawyer was just too friendly and wanted to "say hello" to everyone eating at tables along the sidewalk, no matter if they wanted to "say hello" back.  So, instead we rode over to Blimpy Burger and ate our to-go burgers on the sidewalk while Sawyer enjoyed a nice stick. 

After that we headed back home while Sawyer had a nice, long nap in the backseat.  Once back at the house, Kevin and I enjoyed a nice, long nap in the hammock.  It was a pretty great Sunday Funday!

Tuesday, April 30, 2013

Pinterest Recipe Weekend

This weekend I decided to try a few different recipes that I found on Pinterest.  The first was for Cheesy Baked Quinoa as a side for Kevin's famous chicken thighs and crunchy green beans.  We had Michael and Jessica over for dinner on Friday, so I wanted to try something fun as a side.  Below is the recipe that I found on Pinterest, along with a few changes that I made to it to try to make it a little bit healthier.  

Cheesy Baked Quinoa

1 c. quinoa
2 c. chicken broth ( I used low sodium)
4 oz. (1/2 block) cream cheese (I used fat free cream cheese)
1 & 1/2 c. grated sharp cheddar cheese (I only used 1 c. of 2% sharp cheddar)
1/2 c. grated parmesan cheese
1-2 t. onion powder (I used 1 tsp.)
salt & pepper to taste
any seasonings (i.e. italian seasoning, garlic, herbs, etc.), optional (I used a dash of rosemary, oregano and thyme)


  • In a saucepan, combine quinoa and chicken broth. Bring to a boil. Reduce heat to low, cover, and simmer for about 15 minutes or until liquid is absorbed.
  •  Stir in the rest of the ingredients, reserving 1 c. of the sharp cheddar. Spread into a baking dish (or 4 individual sized baking dishes).
  •  Sprinkle with remaining cheddar cheese.  Bake at 350 F for about 15 minutes, or until cheese is melted and bubbly.

Make sure to follow the directions on the package for cooking quinoa.  If you use too much water or broth, the quinoa will not absorb all of the liquid.

Mix the ingredients together (reserving some of the cheese) then press into a larger dish or four individual serving size dishes.

Ingredients are pressed into the pan
Sprinkle the rest of the cheese on top.  I only used one cup of cheese instead of 1 1/2.
Bake for about 15 minutes and viola!

A perfect replacement for macaroni and cheese!


On Saturday we went over to Nick and Bre's for a Mexican Fiesta night and bonfire.  The girls wanted to have a healthier take on Mexican night, so Bre made veggies with homemade guacamole and taco salads with turkey meat instead of beef tacos or similar.  Her friend brought over four layer bean dip with vegan sour cream.  I decided to make some homemade tortilla chips, that I've made before, and a Pinterest taco dip made with Greek yogurt instead of sour cream.

The link to the actual recipe was broken, but here's the gist of the dip recipe:

Greek Yogurt Taco Dip

1 medium sized tub of Greek Yogurt
1/2 cup of your favorite salsa
Ranch seasoning packet
Taco seasoning packet

  • Combine all ingredients into a bowl, stir
  • Chill to let set
  • Serve 
Since the link was broken on the recipe, I just sort of winged it.  I didn't use the entire ranch or taco seasoning packets, just about half.  I also added a lot of cayenne pepper for a little extra kick.  Next time I'd also use hot salsa instead of medium.  For the tortilla chips, I cut whole wheat tortillas into triangles and then brushed them with olive oil.  Then, I sprinkled some sea salt on them and baked them for 10 minutes at 350 degrees.

Brush on olive oil, sprinkle with sea salt and bake chips

The ingredients

Toss together the ingredients
Mix together in a bowl, then chill for 10 minutes to set

The finished product!


Thursday, April 25, 2013

Wedding Vendors & Details

Kevin and I have been happily married for two months this week, and I thought now would be a great time to give a shout out to all of our amazing wedding and reception vendors!

Our full length wedding video came in last night and I'm happy to say I'm extremely pleased with the results!!  The guys over at Deja-Vu Films were an absolute pleasure to work with.  They have a wonderful way of turning a wedding video into a film as opposed to just a "recap" of the day's events.  They are based out of Columbus, GA and traveled all the way to Fort Lauderdale for our wedding.  You can check out our wedding video on their website here:  http://dejavu-films.com/portfolio/kevin-nicole/.  If you look at the other work on their website you will see what I mean about turning a wedding video into a film.  They 100% lived up to their name!  They were also kind enough to bring along their friend who took some of my favorite photos from the day.  Check out some of his work here:  http://crouchncrasephoto.com/blog/weddings/.

 Our videographers and photographer


 Photo by Nathan Crase

Photo by Nathan Crase

Our wedding was held at the Harbor Beach Marriott Resort and Spa.  We chose a great package for our wedding and got to choose from a list of vendors for our photographer, officiant, musician and florist.  We were also given a Harbor Beach wedding planner, who ended up being a huge lifesaver for us!   

Harbor Beach Marriott on Left
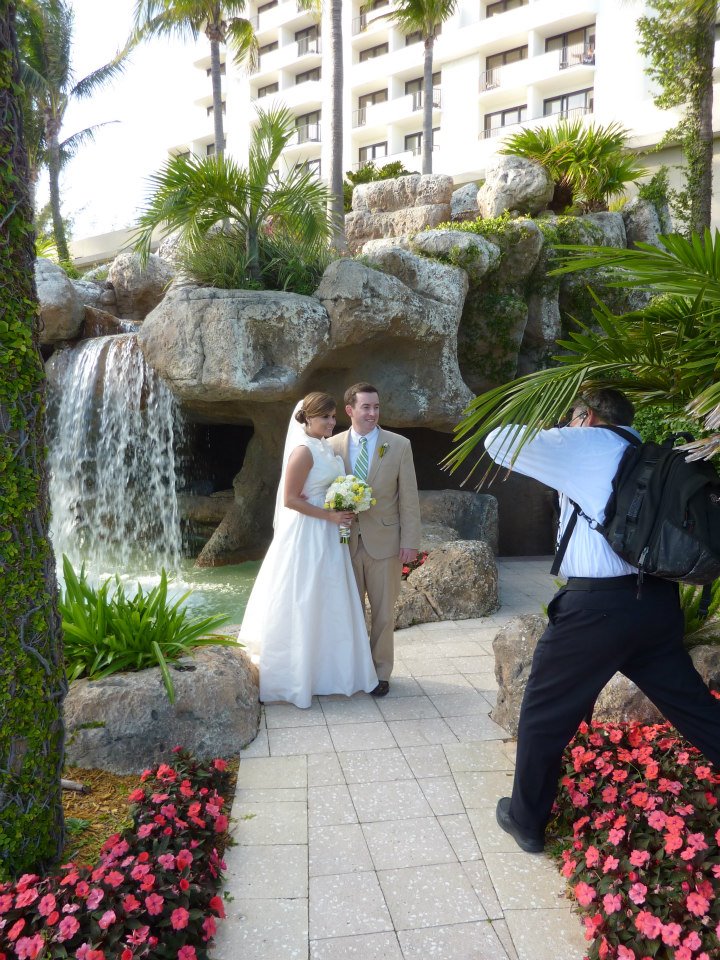
 Our photographer, Tom Weber, provided by Harbor Beach

Our very talented steel drummer provided by Master Musicians.  I walked down the Isle to "Somewhere Over the Rainbow" and back up the isle with Kevin to "Is This Love?" by Bob Marley.


Our wonderful officiant, Charlotte, whose beautiful words can be heard during the first scene of our wedding video.  We chose Charlotte because her wedding ceremony was deeply moving and original, unlike any ceremony we'd ever heard before. 


And now for the story of the florist (who will remain nameless) that almost ruined our entire wedding-- and the wedding planner who saved the day! 

Being an event planner myself, I had everything planned to a "T" including, of course, our florist.  I had planned a year in advance for a beautiful four post bamboo wedding canopy with white fabric draping and an elaborate floral arrangement that would go on top of the canopy during the ceremony, and then after the ceremony it would double as the centerpiece for our reception at 3030 Ocean.  The florist would also be providing my bouquet, Kevin's boutineer and white hydrangeas for my mason jar isle vases. 

The ceremony was drawing closer and closer and I had yet to see my canopy get installed on the beach.  I also hadn't heard from my wedding planner as to the whereabouts of my bouquet.  Then my wedding planner informed me of what I thought might already be the case-- she had been calling, emailing and texting the florist with no response.  She called his partner and everyone else she knew who might know where he was, but he was nowhere to be found.  She told me not to worry, and that she and the team at Harbor Beach would not let this ruin my wedding.

I said, I don't care about the boutineer or even the bouquet.. I just need a canopy; otherwise, we're just getting married in the sand.  She said she'd get me flowers and a canopy if she had to go to Costco to get flowers and make my bouquet herself!  I tried not to let it ruin my day and kept it together without any tears, even though I was heartbroken inside.

Finally with 30 minutes left to the start of my wedding, my wedding planner got back to me and said that she had contacted a backup florist that would be able to provide a bamboo canopy with flowers, a bouquet in my colors, a boutineer and flowers for my isle vases!  The florists rushed to my wedding ceremony in traffic while literally hand tying my bouquet in the car on the way over.  They set up the canopy with flowers, and my wedding only started 30 minutes behind schedule. 

Then my wedding planner, Rochelle Tingling, used the flowers from the ceremony and my mason jars to create a makeshift reception arrangement using the flower petals from her own Valentine's Day bouquet!  Thanks again to Rochelle, Harbor Beach and Panache Style, my backup florists!!

Our ceremony bamboo canopy

Makeshift reception centerpieces

Mason jar isle vases

My bouquet-  tied in the car!

To top it all off, at the end of the night we came back to the room to find a framed and engraved photo from our wedding with the wedding date, chocolate covered strawberries, champagne and a nice card from Rochelle and the staff at Harbor Beach!
 

Here are some photos and details from the other vendors at my wedding:
Invitation suite by Empress Stationary

Makeup by Billy Sullo Salon

Hair by Billy Sullo Salon
Monogrammed veil by Timeless Weddings Shop on Etsy
Parents' gifts by MisterandMrs on Etsy
Mrs. Mulvaney hanger by grinsngiggles12 on Etsy
Wedding dress by JCrew Bridal
Wedding cake by Publix
Lovebirds cake topper by Rue23Paris on Etsy