I decided to make some new curtains for the kitchen window and door. I've made pillows in the past, but this would be my first time making curtains. Here's a before picture of the kitchen and the fabric that was used on the kitchen window, kitchen door and the dining room window.
 |
| Kitchen cabinets, fabric on dining room window |
 | |||
| The door on the left had the same fabric curtains as the kitchen window. The window also has a top valance that you can't see in the photo. |
 |
| This photo is really dark, but here's the top valance |
First thing's first, I needed a sewing machine. My mother-in-law didn't have one, so I had planned to try to borrow Kevin's aunt's sewing machine. Next, I set out to Jo-Ann Fabrics Store to find the right fabric that would match the kitchen, but would also make it look more inviting and fun. I ended up finding a really great fabric that was the perfect color to match the cabinets and was also "younger" looking.
While I was picking up the thread and fabric, I noticed that the store was having a two-day sale. I took a look at the sewing machines and saw that they were all half price! So, I decided to buy my very own Singer Sewing machine for half of the original cost!
Here's the step-by-step tutorial of how I made the curtains on my awesome new machine:
Step One - Measure the windows
Before cutting the fabric, I made sure to measure the windows and record the measurements.
Step Two - Measure the fabric
Next I measured the fabric and made sure I had extra length and width for a half-inch hem around the top and sides, a one inch hem at the bottom, and a two inch opening at the top for the curtain rod.
.jpg) |
| Measuring the width |
 |
| Measuring the length |
Step Three - Cut the fabric
Now it's time to cut the fabric. Make sure to cut it at the correct measurement. You don't want your curtains to be too long or too short. I also made sure to cut off the edge that had the fringe. Some people don't cut it off if it won't be seen, but I went ahead and cut it.
 |
| Cutting the fringe |
Step Four - Measure your hem and pin your fabric
I measured a half-inch hem around the sides and top of the curtain, and a one inch hem at the bottom of the curtain for a nice little detail. Then I pinned the fabric a couple of inches apart.
 |
| Measuring the bottom |
 |
| Pinning the bottom of the fabric |
 |
| Measuring the hem on the sides of the fabric |
Step Five - Iron your hem
Not everyone does this step, but I think ironing your hem helps you keep everything flat and straight when you start to sew.
 |
| Ironing the hem |
Step Six - Sew your hem
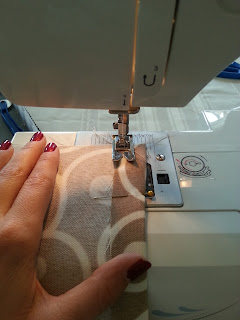
Before sewing, you'll need to follow your machine's instructions on how to thread your bobbin and your needle. After doing a quick test-run on a spare piece of fabric to make sure everything is working correctly with your machine, it's finally time to start sewing your curtains. Go slow and pull out the pins as you guide the fabric through the machine. Once you've come to the end, cut the thread and move on to the next side. Then repeat the process.
 |
| Sewing the bottom hem |
 |
| Sewing the side |
 |
| Cutting the thread |
Step Seven - Iron your fabric
Next I like to iron the fabric again to make sure everything is smooth and ready for the remaining sides to be measured and pinned.
 |
| Ironing the fabric |
Step Eight - Repeat steps 4-7 on the remaining sides
Next, you'll measure and pin the remaining two sides, iron your fabric and sew the remaining hems. repeat the process the same way until every side of your curtain has a nicely sewn hem.
Step Nine - Measure and pin the top of your curtains
I just went with your basic curtains, which have a solid opening at the top for the curtain rod. Some people sew little loops along the top for the curtain rod, but I figured it would be easier to just sew one opening. You'll need to make sure you have enough room at the top for whichever curtain rod you plan to use. The ones for the kitchen window and kitchen door were very small, so I just created a two inch opening.
 |
| Measuring the opening at the top |
 |
| Pinning the top opening for the curtain rod |
Step Ten - Sew the opening for the curtain rod
Follow the same directions as Step Six.
 |
| Here's the finished kitchen door curtain |
 |
| Here's the finished curtain on the new door! |
 |
| I followed the same process for the kitchen window valance |
 |
| Here's the finished kitchen window valance! |
.jpg)
